
In this post, I will learn how to create an AI chatbot using Python, along with a very attractive web UI, and I will explain everything step by step. So, let’s first jump into the prerequisites.

Install the required libraries
First of all, install the Streamlit library so that we can create a very interactive and beautiful web UI for our chatbot.
Install Streamlit: Create a Python environment and run the command below in your activated environment’s terminal to install Streamlit.
pip install streamlit
Streamlit is a Python library that helps you create fast and attractive web UIs. For more details, check out their official website.
Install Groq: Similarly, run the command below to install Groq so that we can use their APIs in our project.
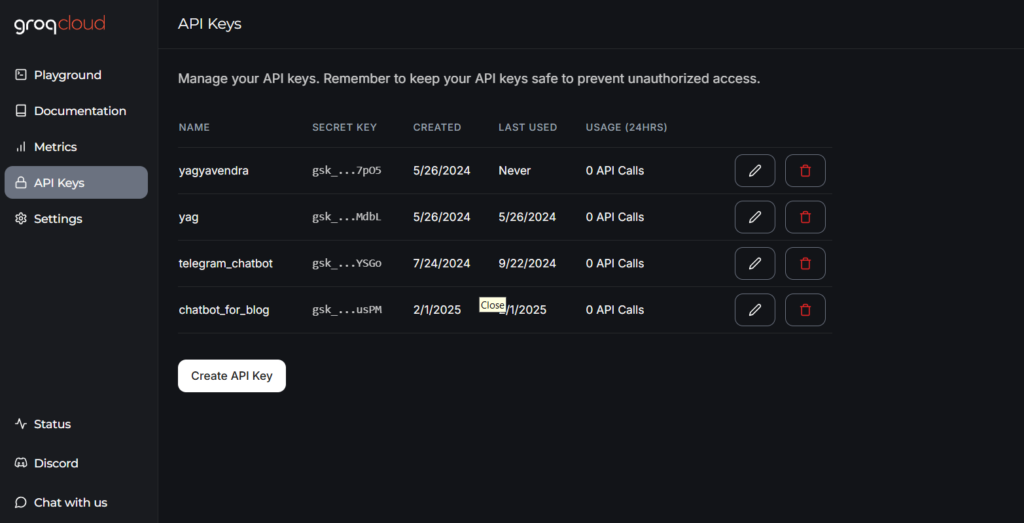
pip install groqGroq is a platform that provides free APIs for all open-source LLM models. After installing the Groq library, you need to set up your Groq account to get API keys, which are required for our project. Remember, the API key is completely free—you just need to sign up and generate it.
- To sign up for Groq → click here
- after signing up you can generate an API key from here 👇
After setting up everything, write the code below and add your actual generated API key.
Source Code
import streamlit as st
from groq import Groq

st.title("💬 Chatbot")
st.caption("🚀 A Streamlit chatbot powered by Groq")

# Initialize session state for chat history
if "messages" not in st.session_state:
    st.session_state["messages"] = [{"role": "assistant", "content": "How can I help you?"}]

# Display chat history
for msg in st.session_state.messages:
    st.chat_message(msg["role"]).write(msg["content"])

# Handle user input
if prompt := st.chat_input():
    # Initialize Groq client
    client = Groq(api_key="replace_with_your_api_key")

    # Append user message
    st.session_state.messages.append({"role": "user", "content": prompt})
    st.chat_message("user").write(prompt)

    # Get response from Groq API
    response = client.chat.completions.create(
        messages=st.session_state.messages,
        model="llama-3.3-70b-versatile",
    )

    msg = response.choices[0].message.content

    # Append assistant response
    st.session_state.messages.append({"role": "assistant", "content": msg})
    st.chat_message("assistant").write(msg)
Output
After pasting the above code, save it as chatbot.py and run the command below to start your web UI.
streamlit run chatbot.pyOutput looks like this 👇

This is all about how we create an AI chatbot using Python. I hope this article helped you learn something new. Thank you for reading, and see you in the next one!


